The Three Part Series
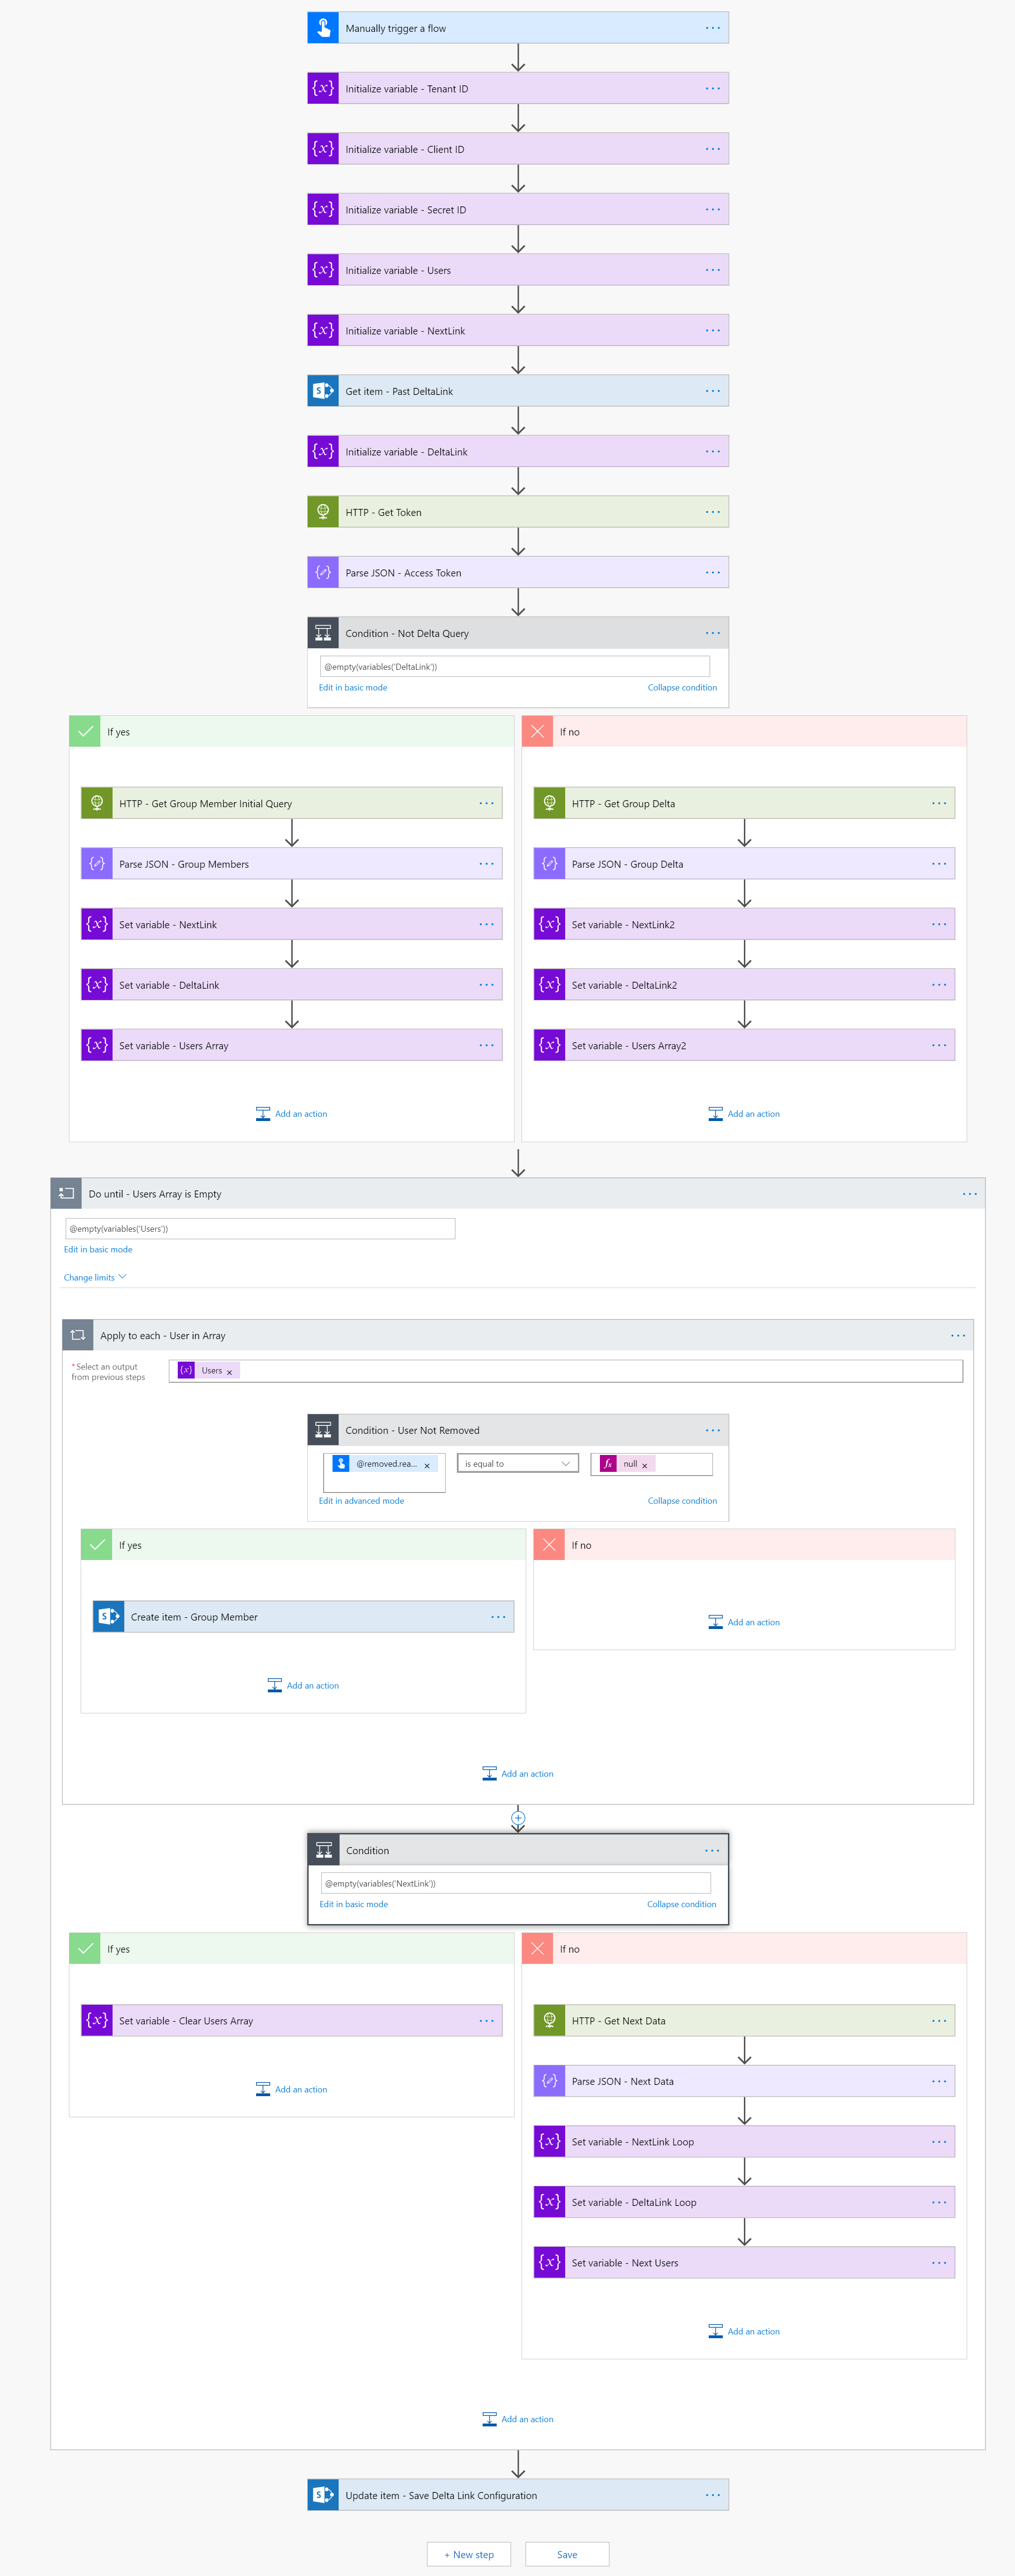
We’re in the home stretch! If you are reading this post without reviewing the two previous posts, beware, we have covered a lot of configuration to get to this point. Make sure you’ve completed Part 1 and Part 2 before you get started on this last part. In this post we’ll add the final plumbing to use the Delta Query that we stored in SharePoint in Part 2 of the series. As I said before, this is a long detailed post, but this one brings it all home. If you get lost in the details don’t despair and don’t panic! I captured the entire flow in a single graphic at the end of this page so you can use it as a map if you get lost.
Part 1: The App, Consent, and the Plan
- Get set up and prepared for creating the Flow
Part 2: Authentication and Initial Request - Create the Flow, get Authenticated, and make the first request
Part 3: Delta Query and Deleted Objects (this post) - Enhance the flow by checking for a saved Delta Link
- Perform a delta request
- Deal with deleted objects
The Final Steps
At this point we have the Flow working to perform the initial query, process users, and store the deltaLink. We need to add an action to fetch the Delta Link from SharePoint (if it exists) and then process the Delta query. If SharePoint returns an empty link, the Flow path we created in Part 2 runs to generate a new deltaLink. So, in this post, we’ll edit the Flow and add the necessary logic.
Fetch the Delta Query Link from SharePoint
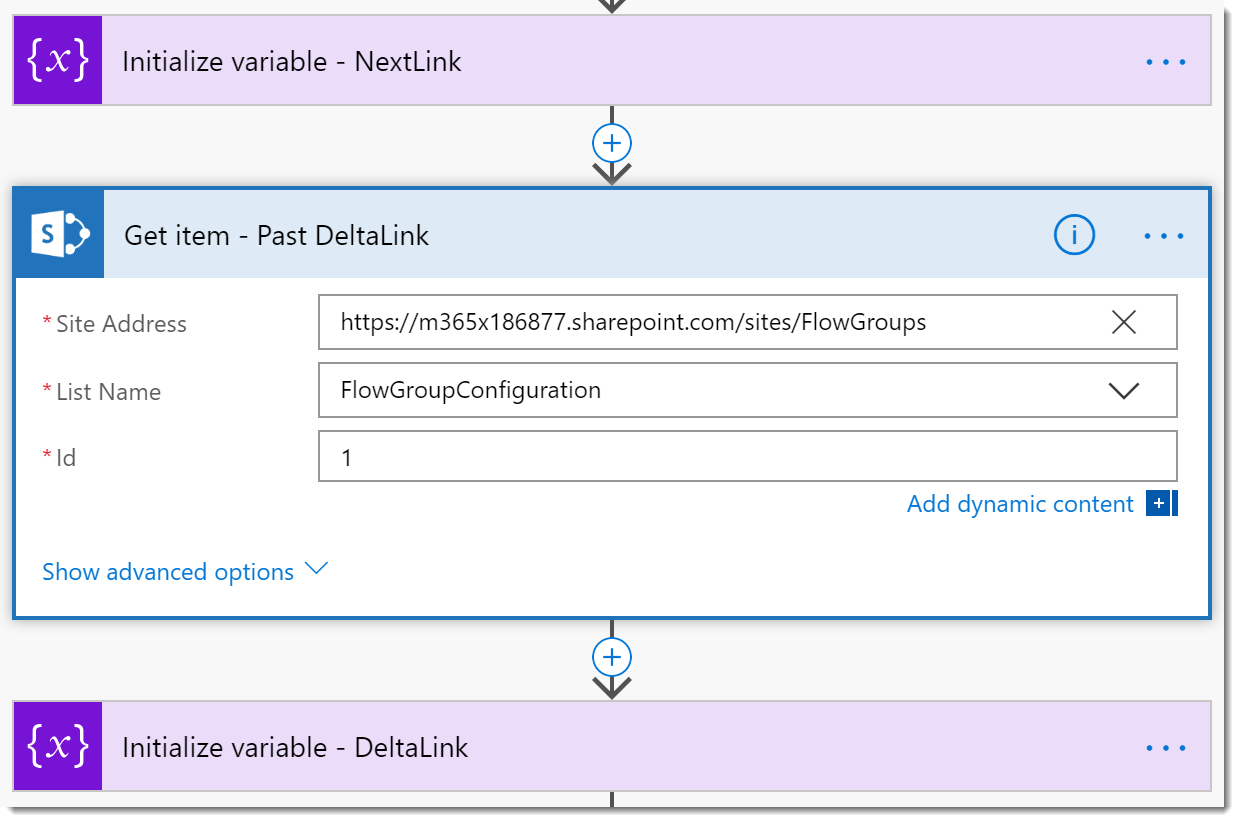
- Edit the Flow and add a SharePoint Get Item action between the Initialize variable - NextLink and Initialize variable - DeltaLink.
- Rename the action to Get item - Past DeltaLink.
- Configure the action as follows:
- Site Address: {your SharePoint site URL}
- ListName: FlowGroupsConfiguration
- Id: 1
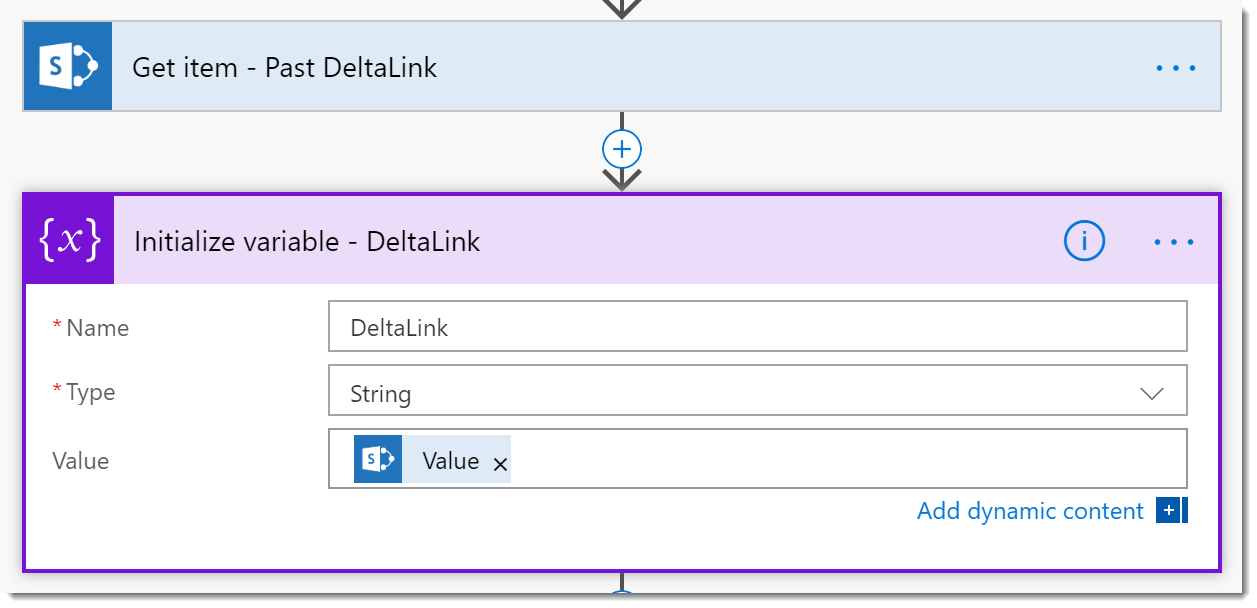
- Now change the Initialize variable - DeltaLink action so it uses the value from SharePoint. Set the Value property to Get item - Past DeltaLink Value.
Add a Condition for Handling the Delta Link
After we have the access token, we need to determine if were starting fresh without a deltaLink, in which case we’d run the Flow from Part 2 to perform the initial query and user processing, or running a Delta Query. In this section we’ll add a condition to check the result from SharePoint and then branch accordingly.
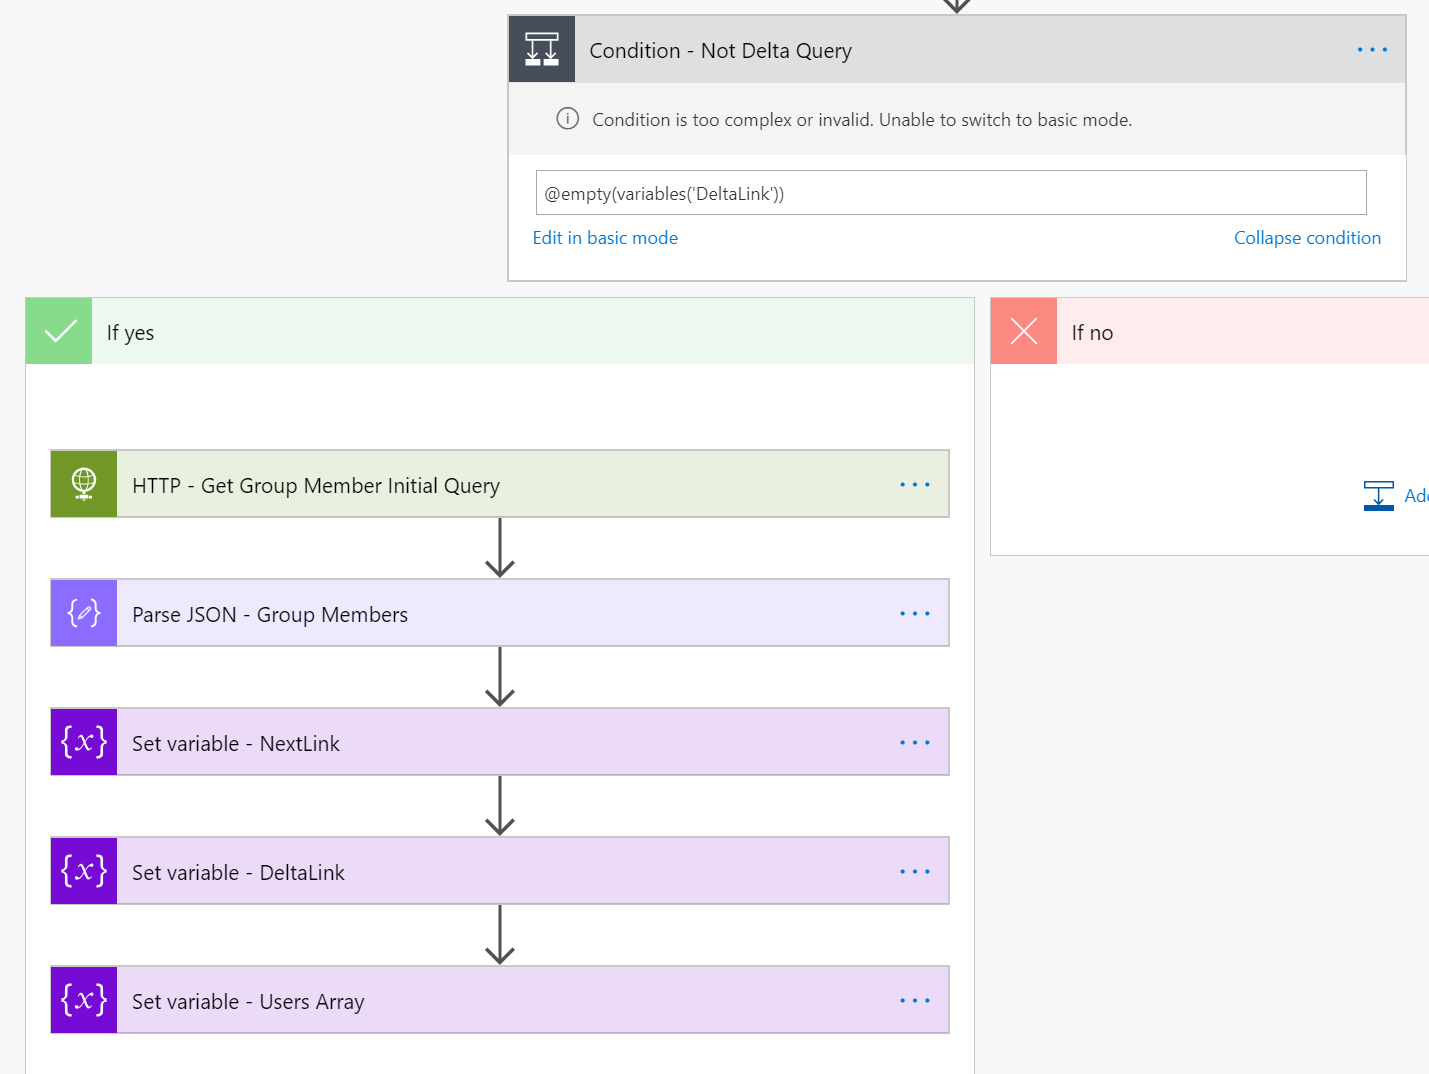
- Add a new Condition action below the Parse JSON - Access Token action.
- Rename the Condition to Condition - Not Delta Query
- In the Advanced mode set the Condition to
@empty(variables('DeltaLink')). - One at a time, drag and drop the following actions into the Yes side of the Condition. Be sure to maintain the order.
- HTTP - Get Group Member Initial Query
- Parse JSON - Group Members
- Set variable - NextLink
- Set variable - DeltaLink
- Set variable - Users Array
Handle the Delta Link
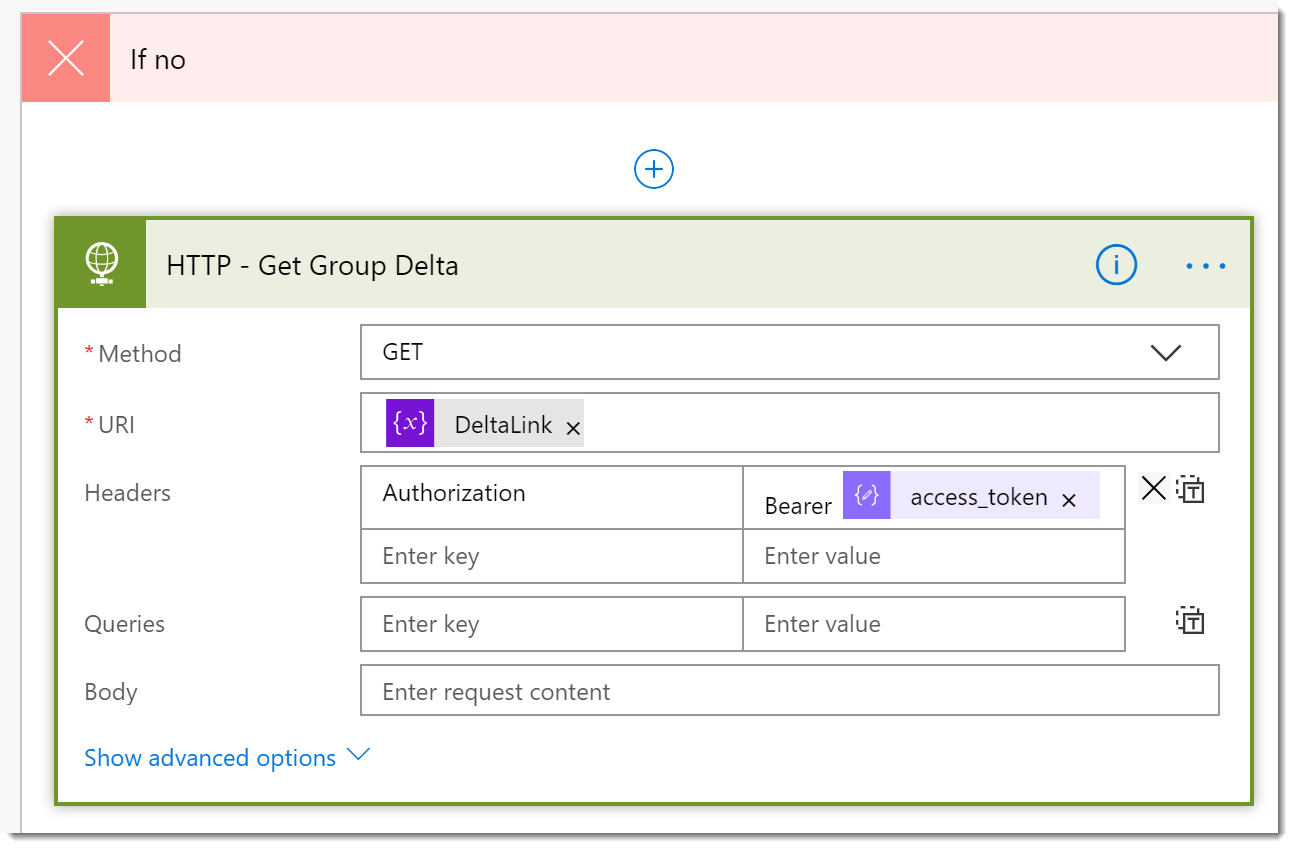
- Inside the No side of the Condition - Not Delta Query add an HTTP action.
- Rename the action HTTP - Get Group Delta
- Configure the action as follows:
- Method: GET
- URI: DeltaLink Variable
- Headers: Authorization | Bearer {access_token}
- Under the HTTP - Get Group Delta (still inside the No side of the condition) add a Parse JSON action and three Set variable actions.
- Rename the actions Parse JSON - Group Delta, Set variable - NextLink2, Set variable - DeltaLink2, and Set variable - Users Array2.
- Configure the Parse JSON - Group Delta as follows:
- Content: HTTP - Get Group Delta body property.
- Schema: Click the Use sample payload… link and paste in the complete payload we used in Part 2. In case you don’t have it, here it is again:
{
"@odata.context": "https://graph.microsoft.com/beta/$metadata#groups(displayName,description,members)",
"@odata.deltaLink": "https://graph.microsoft.com/beta/groups/delta/?$deltatoken=rUj7-LdP8JZhP1eR4xwz8RFLB10gzqT4VuUmz2aba8tcB5NxzFGmUQgI3AlFDJJc4d9ZzgtsbBAsOodPpYW4d-mq1jGwJJxgeIx7w06Sfj1lZ3DjfrZ5LK84qT-c_5ghdwmt96DHVOrgfscS",
"@odata.nextLink": "https://graph.microsoft.com/beta/groups/delta/?$skiptoken=rUj7-LdP8JZhP1eR4xwz8RFLB10gzqT4VuUmz2aba8sDbpfE38oeFi6if63K9w1nK9VN1n4yiakdtAI8XJ_8vQUL4rbSs8El740j...",
"value": [
  {
  "displayName": "Spanning Protected Users",
  "description": "Users protected by Spanning Backup for Office 365",
  "id": "d3dd0158-a239-4417-bd75-150a16bfdc99",
  "members@delta": [
      {
      "@odata.type": "#microsoft.graph.user",
      "id": "e2e6d7ad-eb03-4466-a05c-74dee6b60b10",
      "@removed": {
          "reason": "deleted"
      }
      },
      {
      "@odata.type": "#microsoft.graph.user",
      "id": "13af31a2-18e9-432e-bb21-c6989c85af18"
      },
      {
      "@odata.type": "#microsoft.graph.user",
      "id": "d04f8905-55e3-4be9-af52-5c4abe131989"
      }
  ]
  }
]
}
- While you have that on the clipboard. Go ahead and update the Parse JSON - Group Members on the Yes side of the Condition with this same Schema. Click the Use sample payload… button and paste it in. Click Done. Both sides should now have identical JSON Schema that have
deltaLinkandnextLinkproperties. - Edit each of the variables settings to the corresponding values from the Parse JSON - Group Delta output.
- For Set variable - NextLink2
- Name: NextLink
- Value: Parse JSON - Group Delta
@odata.nextLink
- For Set variable - DeltaLink2
- Name: DeltaLink
- Value: Parse JSON - Group Delta
@odata.deltaLink
- For Set variable - Users Array2
- Name: Users
- Value: Set the Expression to
First(body('Parse_JSON_-_Group_Delta')?['value'])?['members@delta']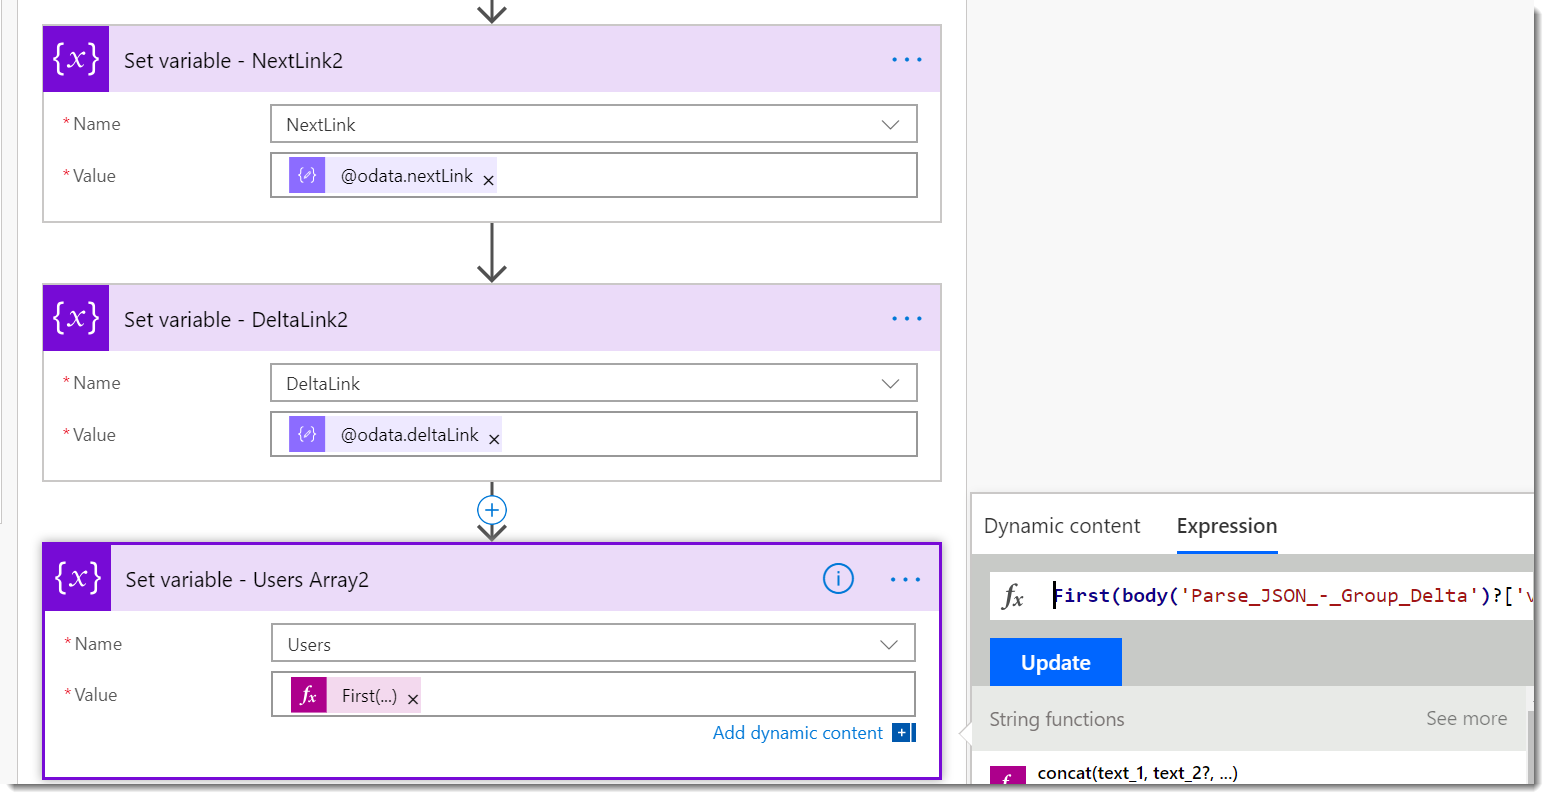
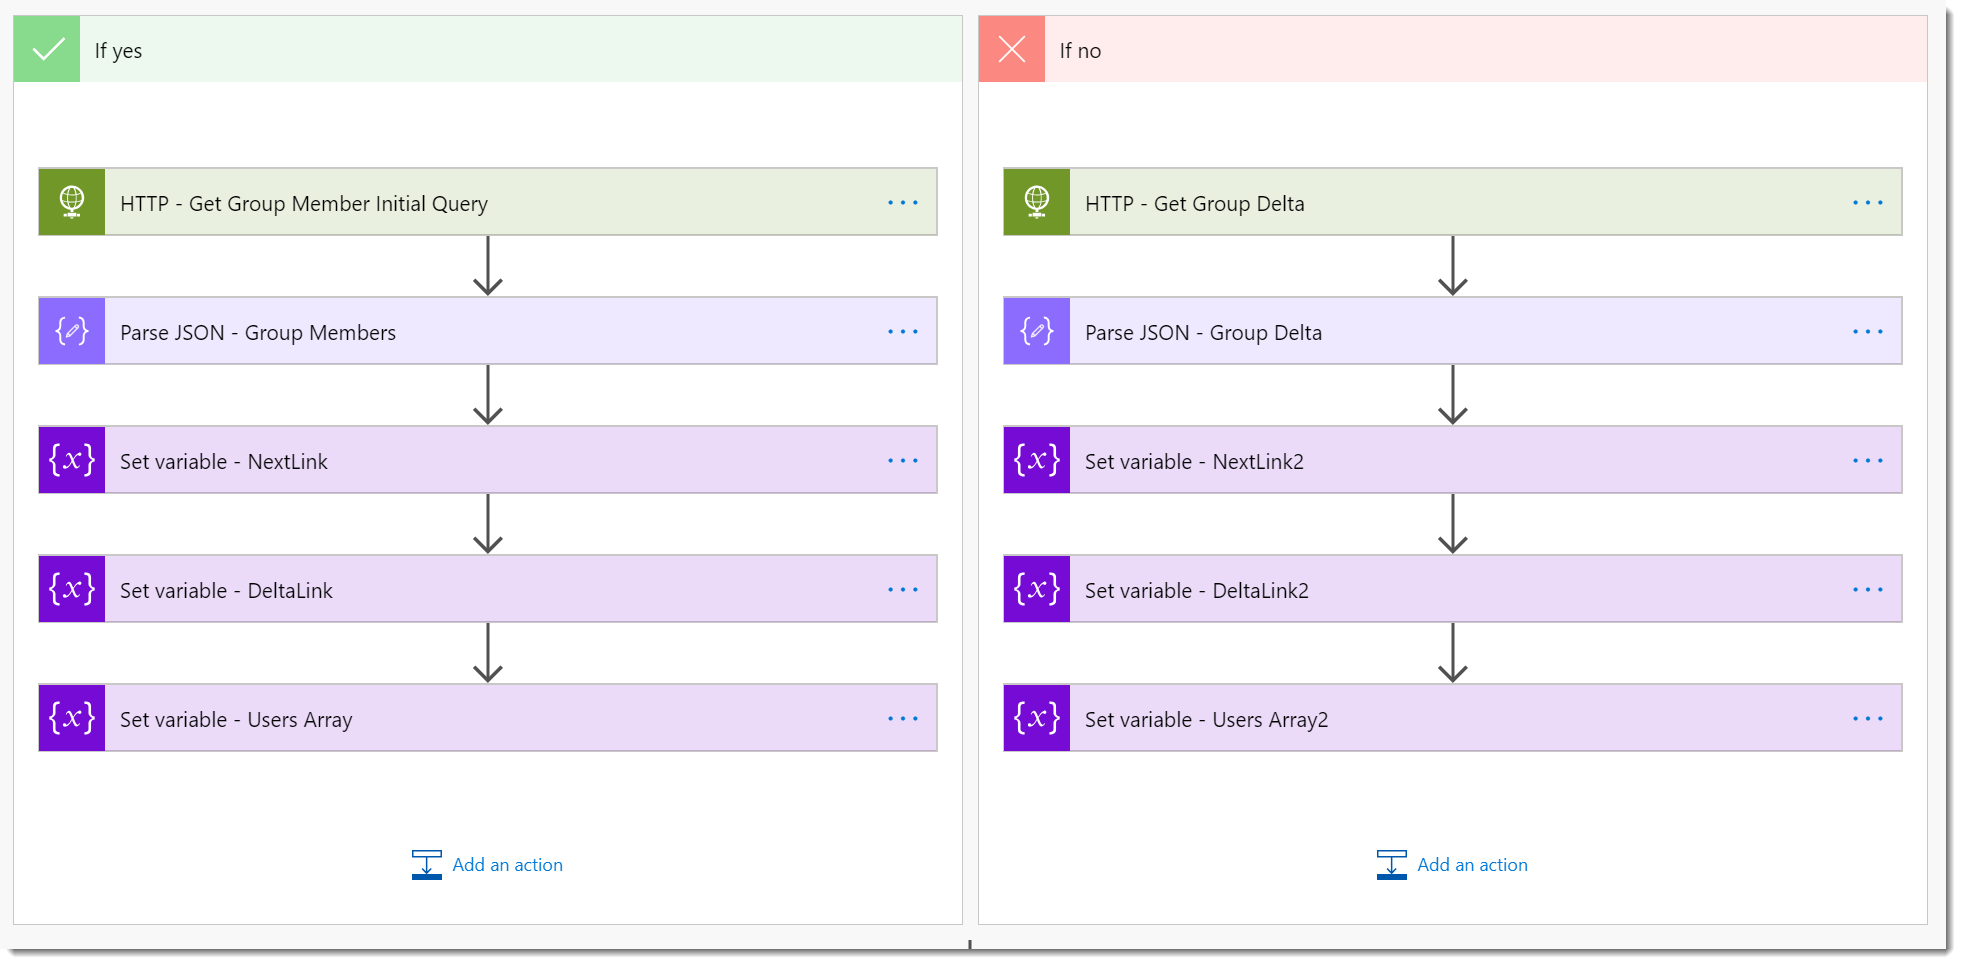
- Lastly, on the Yes side of the Condition in the Set variable - DeltaLink action, set the Value to the Parse JSON - Group Members output of
@odata.deltaLink. - Save your Flow. At this point the two sides of the condition should look the same. I realize that we could optimize this Flow a bit in this spot. But I’ll leave that to you. Here is what the condition looks like now.
Testing the entire Flow
OK, You have made it this far, congratulations. Before you test your Flow, clear out the DeltaLink Value field in the FlowGroupsConfiguration list item. Also delete all of the entries in the FlowGroups list. For testing we want to see two things happen. On the first run we want to see the initialization logic run. On the second and all subsequent runs we want to see the Delta logic run.
- After clearing out your list data, test the Flow.
- The Yes side of the Condition - Not Delta Query should process.
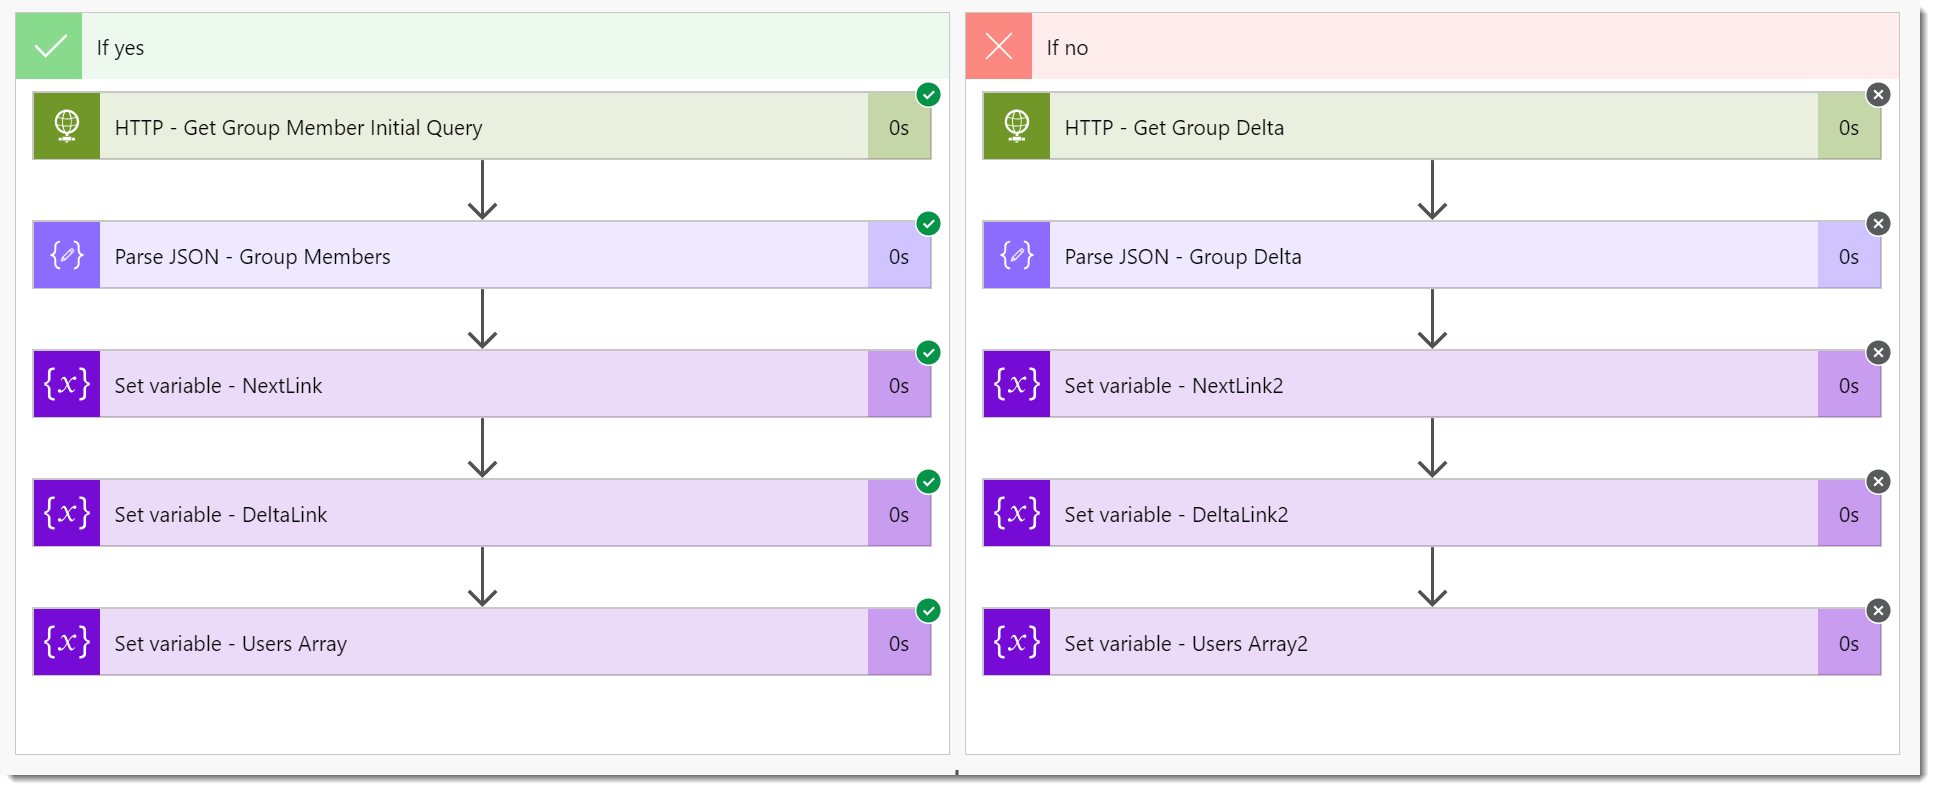
- The FlowGroups list should be populated with your group members.
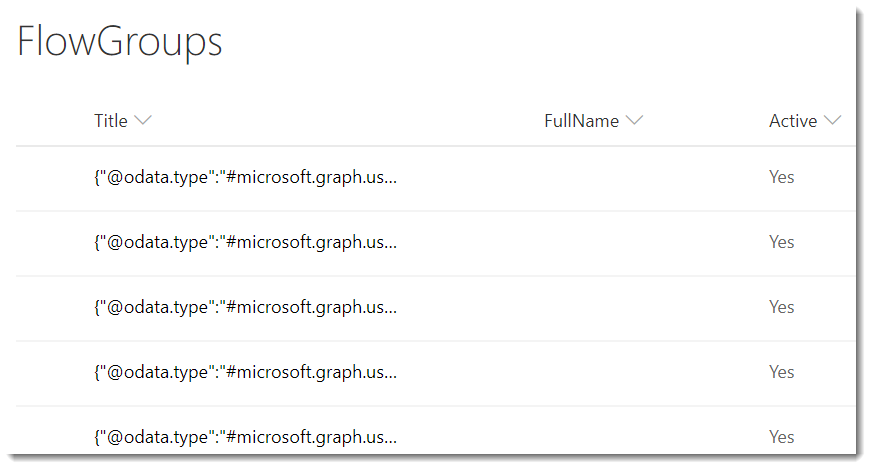
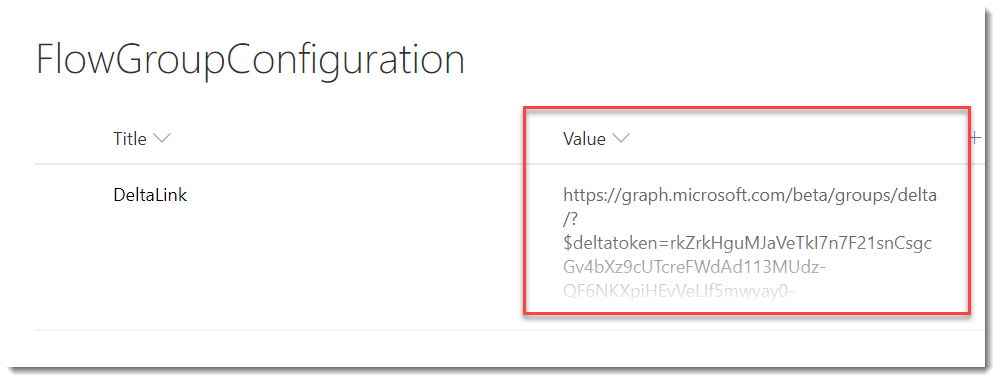
- The FlowGroupsConfiguration list should contain the Delta Link value.
- Add a couple of users to the group in Azure AD, wait a minute, and rerun the Flow. This time the No side of the Condition - Not Delta Query should process.

- The FlowGroups list should be populated with the newly added group members.
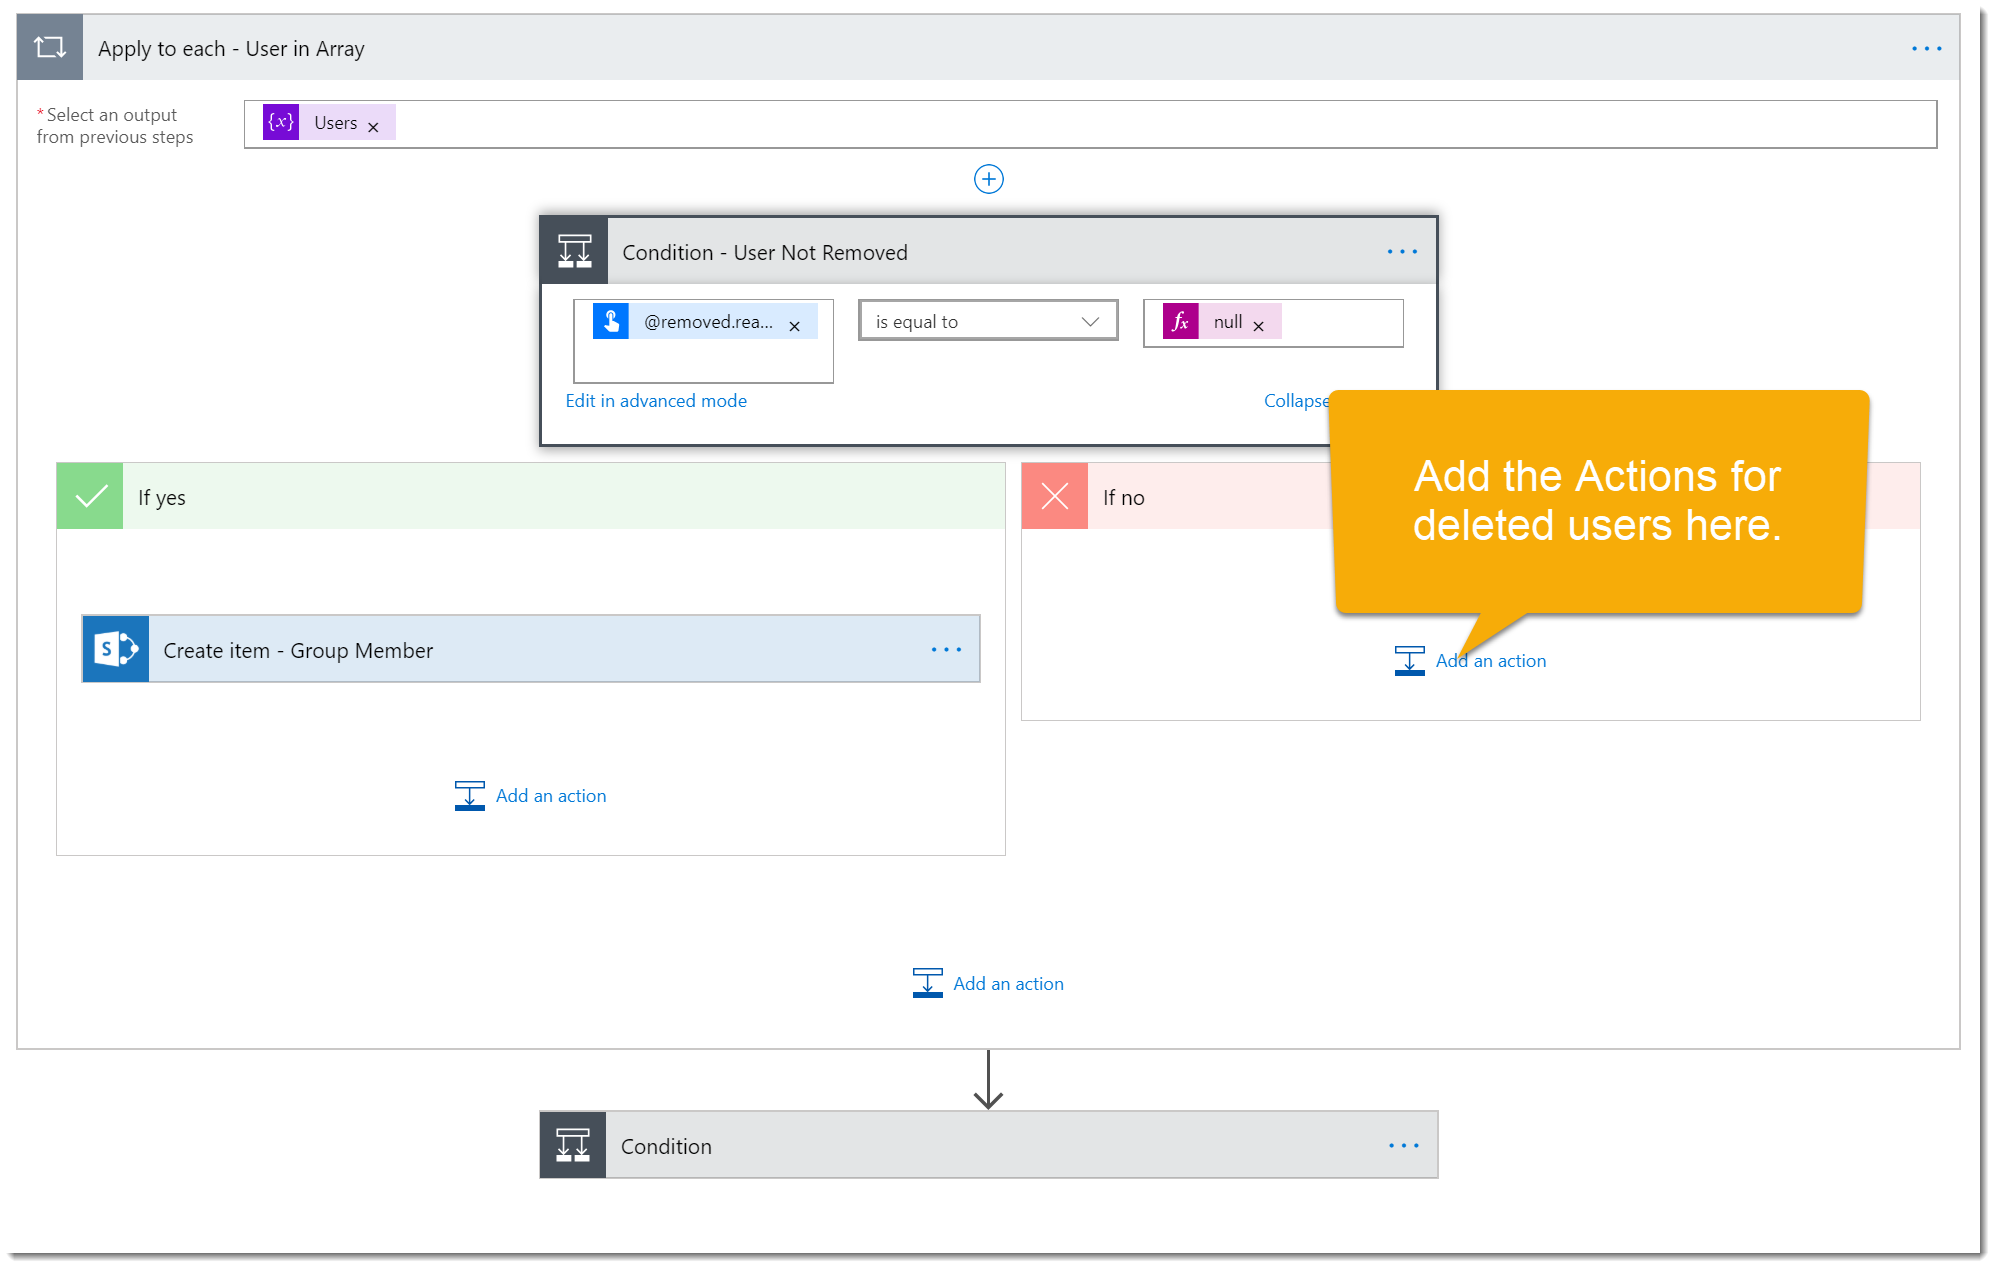
Handling Deleted Objects
You may have noticed when we received the results from the Group request there were User objects that were tagged as removed and reason:deleted was included in the response. When we processed the User Array we added a Condition - User Not Removed so that we could only process the “active” or “existing” users. What if you want to do something with those deleted users? You can process those users by adding Flow actions to the If no side of the Condition - User Not Removed.
Conclusion
Congratulations! You have done an epic amount of work to follow along with this whole post series. There is still a bit of work to be done. For example, you can get additional details about your users by making an additional Graph request for User information. I’ll show you how in a different post I have planned. For now, if you made it all the way through, you have the basics of what you need for working with Azure AD Groups and the Microsoft Graph. You can use the Save As… menu to make a copy any time you get asked for this kind of functionality. Let me know what you think about the series and post any questions. I’ll be happy to help out if I can.
The Video
The Whole Flow