Introduction
This is Part 2 of a 4 part series on how to create an image search center on a MOSS site. My goal is to create a search results page similar to the Microsoft Live Search Images page. In Part 1 I explored the out of the box search experience for images and walked through the setup required to get the indexer to crawl image file types. We concluded the post with an issue: images stored in document libraries are not indexed the same as images stored in Picture libraries and on file shares.
Hey! Where are my properties?
In order for SharePoint to index the properties of your image files, including the file extension, you need to install an IFilter for the image types you are interested in. There are several on the market. I have used the following two:
For the examples in this post I am using the XMP Filter from the IFilter Shop. I have used the Aiming Tech filter and have found it to be limited and the support non-existent. They don’t respond to e-mail (or update their web site). The IFilter Shop, on the other hand, has real people who support their products. Additionally, you can create custom property maps for your images. This means that if you create images with custom metadata, you can configure the XmpFilter to return that custom metadata to the index. You get what you pay for.
IFilter Installation and Troubleshooting
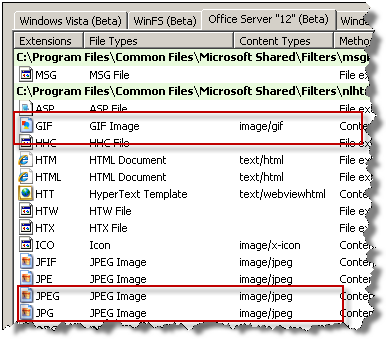
The free IFilter Explorer is a great diagnostic tool for troubleshooting IFilter installation. After installing this utility on your server, open it and select the Office Server “12” tab. Notice that GIF, JPEG, and JPG are all associated with the HTML IFilter. PNG files are not associated with any filter.
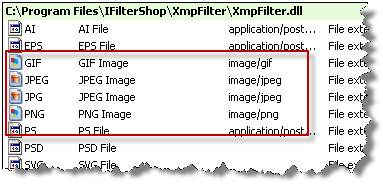
Installing the XMP IFilter is easy enough. The IFilter needs to be installed on the server that is running your Index Service. (If you want to associate images with your file types that will be returned by SharePoint, the images are installed on the Web Front Ends.) Following the installation you will notice that GIF, JPEG, JPG are now associated with the XmpFilter. The installation also adds support for PNG files.
Crawl Again
Following the installation of the XMP IFilter you must re-index all the content with a full crawl. Following the crawl you can test your results by executing the property query “fileextension:jpg” and notice the difference in the results from Part 1:
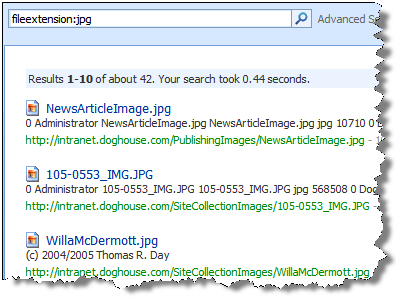
I get 42 results, 40 are the images that I loaded for the test, 2 are the out of the box images that ship with the site collection. OK, now we’re cookin’. We are returning all of our images and we are able to find them with property filters and the help of our new IFilter.
Crawled Properties and Managed Properties
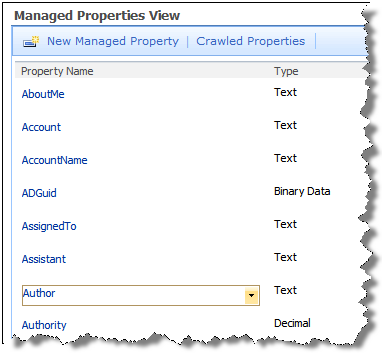
When the indexer crawls documents the IFilter associated with the file type returns “Crawled Properties”. SharePoint keeps track of these properties but does nothing with them unless they are promoted to “Managed Properties”. Out of the box there are over 100 managed properties. You can add your own managed properties or edit existing properties.
Add Properties to Results
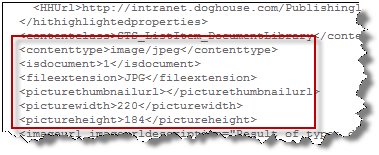
The Selected Columns property of the Search Core Results Web part is where you add additional Managed Properties to the search results interface. I always add ContentType and FileExtension to the default list of properties:
<Column Name="ContentType"/>
<Column Name="FileExtension"/><Column Name="PictureWidth"/>
<Column Name="PictureHeight"/>At this point your XML results should look something like this:
Why don’t I see all my properties?
You may notice that the files returned from the File Share and Document Libraries do not include the PictureHeight and PictureWidth, though properties are returned by the Picture library and Publishing Images libraries. In the next installment we’ll detail how to configure the crawled properties returned by the IFilter and map them to Managed Properties.