One of the chores that I really wish Microsoft would make easier in SharePoint is configuring Forms Based Authentication (FBA). I know this could be quite a challenge and I know that “once you do it a couple times it is pretty easy”. But for us mere mortals who only configure FBA every so often it can be a bit tricky. My biggest pet peeve is copy and paste errors that TOTALLY crash the site. Then the joy of trying to figure out each setting that may have caused the error, only to find it’s caused by a quote that you thought was a double quote but tuned out to be something that looks like a double quote but is really an internet terrorist punctuation mark from hell sent to ruin your day. So, is there a “safer way” to edit your web.config files? Yes, there is.
Trusted Information
There are a TON of “Hey, here’s how to set up FBA for SharePoint” blog posts out there, most of them are horrible (and wrong). My most favorite is by Mirjam van Olst, Configuring Claims and FBA for SQL. This is a very comprehensive post that works for me every time. My challenge is getting the sections in the right place, which is where IIS Manager is a huge help. Those of us who work in SharePoint a lot are prone to warn folks to avoid using IIS Manager to make changes to your SharePoint based sites, since SharePoint manages just about everything related to the IIS Site. Well, it turns out that IIS Manager is really good at editing web.config files without screwing them up. So let’s use it.
IIS Manager
I am not going to recreate Mirjam’s work, I am just going to show you that you can implement her post without using a text editor for the main editing chore. Here are the high level steps:
- Create a SQL Membership Database using aspnet_regsql.exe.
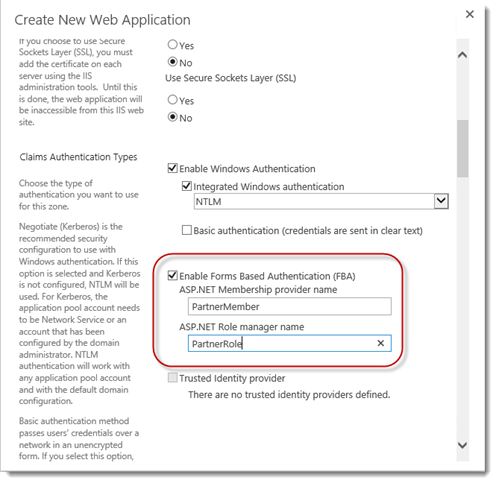
- Create a SharePoint Web Application that uses FBA (Make note of the ASP.NET Membership provider and Role Manager entries)
- Create the site collection
- Edit the web config files for
- Central Administration
- The FBA Web Application
- The Security Token Service Application
- Test Everything
In my case I did the following:
-
I created a new database called SharePoint_FBA and seeded it with one user “John”.
-
I created a new Web Application and enabled FBA with the PartnerMember and PartnerRole identities.
-
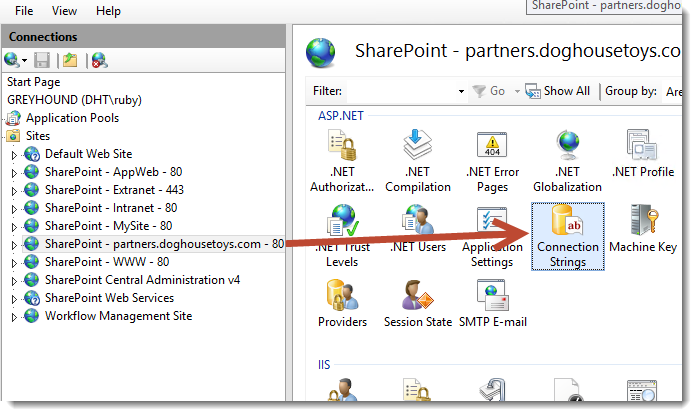
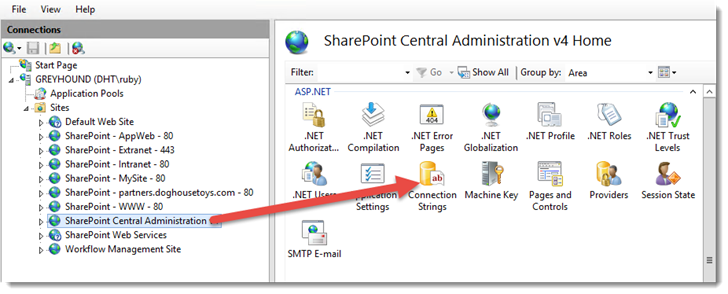
Then I open up IIS Manager and set to work creating the necessary settings according to Mirjam’s post. First I click on the site in IIS Manager and double click Connection Strings.
-
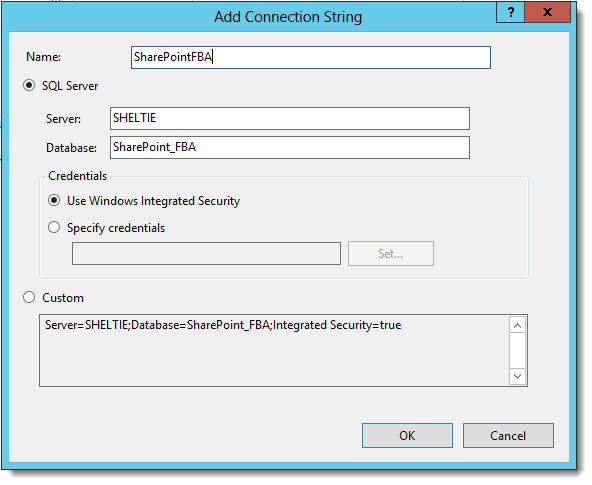
Click Add and enter the settings for your database. (Screen shot this, you are going to do it 3 more times.)
-
Click OK and click on your site again to see all of the settings.
-
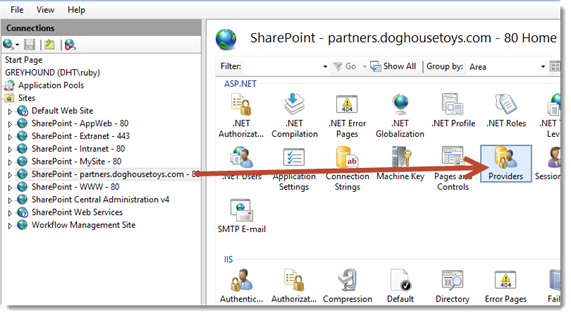
With your site selected double click Providers.
-
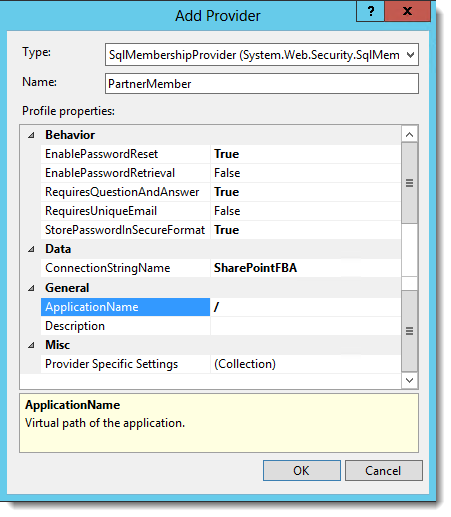
Ensure the Feature selector is set to .Net Roles and click Add. For Type select SqlRoleProvider and supply the name that you used when you configured the Web Application in SharePoint. In my case the role manager is PartnerRole. For application name use “/”. Click the ConnectionStringName combo box and choose the connection string you created in the previous step. (Feel a little more in control?)

-
Click OK to save the new provider.
-
Change the Feature selector to .NET Users and click Add. For Type select SqlMembershipProvider. Enter the Name of the membership provider you used when you configured the Web Application in SharePoint. In my case the Membership provider is PartnerMember. Click the ConnectionStringName combo box and choose the connection string you created in the previous step. Change the Change any additional settings as necessary, I just follow Mirjam’s blog post.
-
Click OK to close the dialog.
Lather, Rinse, Repeat
Now you have to follow these exact steps for the Central Administration site and the Security Token Service.
-
In IIS Manager, click on SharePoint Central Administration and then double click Connection Strings. Do the same thing you did above for Connection Strings, SQL Role manager and SQL Membership Provider.
-
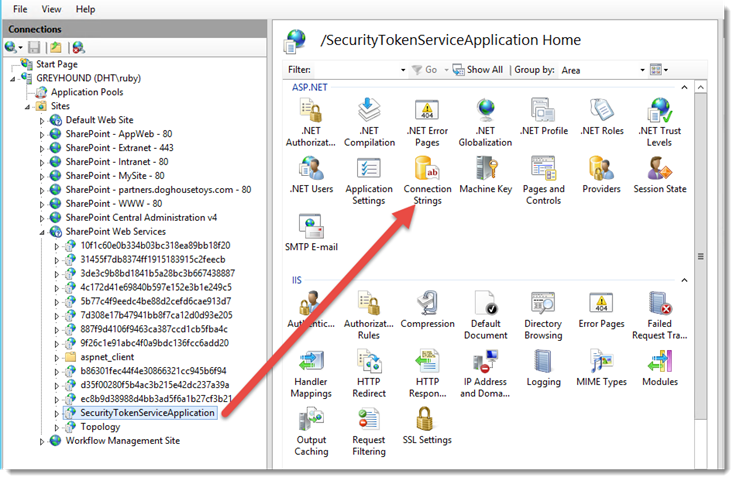
Next, in IIS Manager, expand the SharePoint Web Services site node and click the SecurityTokenServiceApplication object. Double click the Connection Strings module and do the same thing you did above for Connection Strings, SQL Role manager and SQL Membership Provider.
One Last Thing
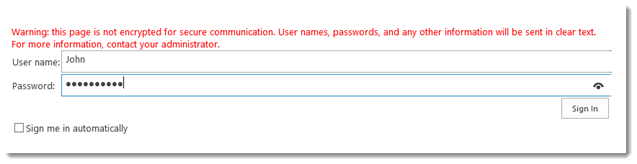
There is one setting that I have not found a way to add without a text editor, that is the PeoplePickerWildcards entry, though I have not had as much trouble with that one as I have the others. So I just open the files and add that as needed. If I figure out a way I’ll let you know. So now test your work and you should get the login page:
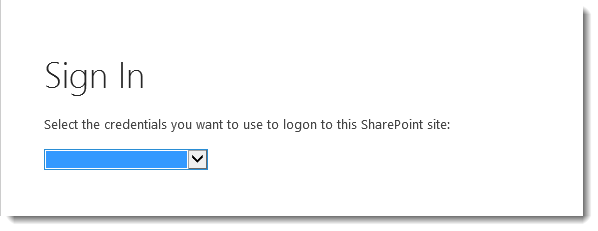
And the selector for FBA.
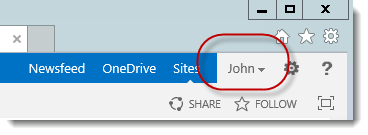
And on successful login, the site.
Thanks to Mirjam for an outstanding post. It is my benchmark for configuring FBA.