This is one of my favorite tips to show during my Conference Sessions. I think it makes the Search UI so much more fun and easy to use when working with people. Oh, and you don’t have to reserve your self to only Search results. This tip ought to work anywhere in SharePoint that you have an email address (actually, a properly formatted SIP address).
Presentation
The presence awareness of SharePoint depends on a couple different pieces of technology all working together, namely:
- SharePoint
- Exchange
- Lync
- Active Directory
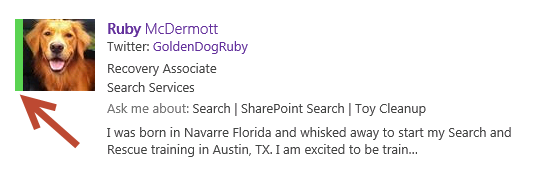
Once you have them all wired up and images are showing correctly, you should begin to see them on the people search results page. This is Ruby’s search result showing that she is currently online.
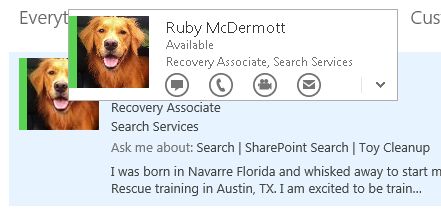
If I hover over her image I can look at her contact card. From the contact card I can initiate a chat, phone call, video conference or email her.
Business Case
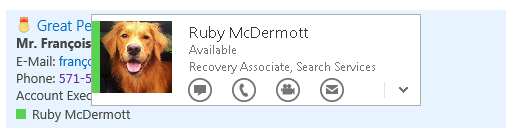
So what if you’d like to add this capability to a display template that you are building? For example you want to search a customer database and in that database you have references to your sales people. If you have a valid SIP address (often the users email address) you can build presence into your display template.

Build It
I previously posted about creating Display Templates. I will not cover every step, just those needed to add this ability. In order for all this to work you need some data. The main element is a valid SIP address (I know I am repeating myself, buy this really is the key to making it all work.) If you look at the preceding images you will see that I have a bunch of data about the customer, but I also have the data about the Sales Person, in this case Ruby. For this to work you need:
- The User’s Name
- The User’s Email Address
- The User’s SIP Address
- Optionally, you need the Picture URL, but it depends on what you want to show
-
Add the following variables to the top of your display template. Notice that I am calling the Context Current Item to get my variables. This is really the hardest part.
var userPersonaId = $htmlEncode(id) + "_peopleUserPersona"; var uSip = ctx.CurrentItem.DHTSalesPersonEmail; var uEmail = ctx.CurrentItem.DHTSalesPersonEmail; var uName = ctx.CurrentItem.DHTSalesPerson; var uPicUrl = null; -
Now you need to decide where you want the presence icon to be presented. Add the following div tag in that location. My syntax highlighter is not working on HTML…
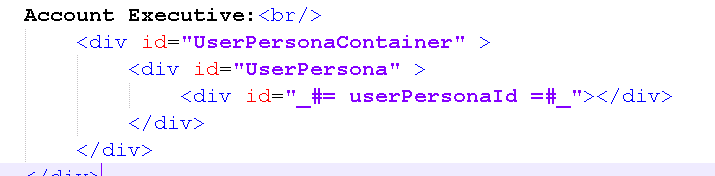
-
Finally insert the following code near the bottom of your template. This code registers a callback to load the script and display the presence icon for you. There are a couple different display options available, this one presents the simplest, a presence icon without a picture.
AddPostRenderCallback(ctx, function(){ EnsureScriptFunc("clienttemplates.js", "RenderUserFieldWorker", function() { var getUserPersona = function() { var renderCtx = new ContextInfo(); renderCtx.Templates = {}; renderCtx.Templates["Fields"] = {}; var fieldSchemaData = { "DefaultRender":"1", "PictureSize": "None"}; var listSchema = {"EffectivePresenceEnabled": "1", "PresenceAlt": Srch.Res.item_People_NoPresenceAvailable}; var userData = {"title": uName, "email": uEmail, "picture": uPicUrl, "sip": uSip}; var personaControlElement = document.getElementById(userPersonaId); if (!Srch.U.n(personaControlElement)) { personaControlElement.innerHTML = RenderUserFieldWorker(renderCtx, fieldSchemaData, userData, listSchema); } if(typeof(ctx.EnqueueImnRequest) == "undefined") { ctx.EnqueueImnRequest = false; } if (ctx.EnqueueImnRequest == false) { ctx.ClientControl.add_oneTimeResultRendered(function(){ if (typeof(ProcessImn) != "undefined") { ProcessImn(); } }); ctx.EnqueueImnRequest = true; } }; getUserPersona(); }); }); -
Test your page by running a query and evaluating the results. In my case it looks like this.

Display Options
You have a couple options for the picture. If you provide a URL SharePoint will render that image. If you set the uPicUrl to null SharePoint will go get it for you as long as you don’t have cross domain issues. If you do have cross domain issues, like your My Site Host is on a different Web Application, then you have to tell your template that it’s OK. Do this with the following code.
_spPageContextInfo.crossDomainPhotosEnabled = true;I have not enumerated every possible display option, but here are a couple that I have found. You can change the options through two parameters fieldSchemaData and listSchema. The picture size essentially maps to the user profile small, medium and large thumbnails.
| fieldSchemaData | Purpose | Values | Output |
|---|---|---|---|
| PictureSize | Size of picture to be presented | None, Size_72px, Size_48px, Size_36px | Size_72px  |
| DefaultRender | Use default rendering | 1 | PictureSize “None” 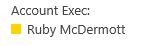 |
| WithPictureDetail | Show picture and name | 1 | 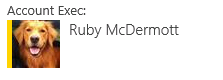 |
| PictureOnly | Show only the picture | 1 |  |
| PresenceOnly | Only show presence | 1 | 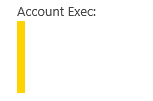 |
You can add more to the userData object to, like jobTitle and department then the WithPictureDetail option shows a bit more detail.

Conclusion
There are MANY options and combinations that will allow you to create a pleasing UI. Play with it and let me know what you think! Here’s the file I used for this demo.